
Publish Azure DevOps Extensions using Azure Workload Identity
As you may know, I maintain several Azure DevOps Extensions. To publish them I use the Azure DevOps extension tasks. And to authenticate you must provide a Personal Access Token.


If you need help configuring a basic CI/CD pipeline for an Azure DevOps Extension, check out the guidance on Microsoft Learn).
The issue with Personal Access Tokens is that they're always active, expire (more frequently depending on organization policy) and tend to grant more access than you'd want.
Recently the whole of Azure DevOps got support for Workload Identities. A workload identity uses a service principal and OIDC to create a temporary token for your Azure Pipelines job to authenticate and every service in Azure DevOps that accepts a PAT will also accept a token acquired this way.
Setting it up wasn't as straight forward as I'd have liked, but now that it's working, I should no longer have to worry about Personal Access Tokens, whether they're still stored securely and won't expire when I least expect it.
The same should also work for GitHub Actions, but I haven't gotten to setting that up yet.
You can find the official documentation to setup the Workload Identity and registering it in Azure DevOps here. But the docs don't specifically spell out this exact scenario and I ran into several issues along the way.
The following steps are needed to convert your publishing pipeline to a Workload Identity too:
- Turn on the Workload Identity preview
- Create a Service Connection in Azure DevOps using the new Workload Identity type
- Add the Service Principal to your Azure DevOps organization as a user
- Extract the Azure DevOps Identity Id from the profile API
- Add the Service Principal to your Azure DevOps Marketplace publisher
- Find the Id of your Visual Studio Marketplace service connection
- Add an
AzureCLIstep to your pipeline(s) to request a valid token for the job
Below I'll take you in detail through each step.
Turn on the Workload Identity preview
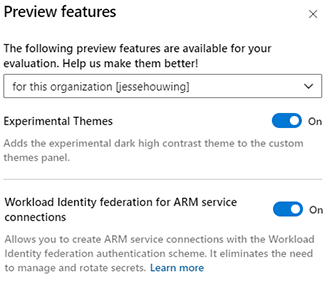
For now, to use a Workload Identity you need to activate the Workload Identity preview feature in your Azure DevOps organization:
✅ Workload Identity federation for ARM service connections
Allows you to create ARM service connections with the Workload Identity federation authentication scheme. It eliminates the need to manage and rotate secrets. Learn more.
Create a Service Connection in Azure DevOps using the new Workload Identity type
I'm assuming you have sufficient permissions in your Azure Subscription to set up a Service Principal here. I have and can thus use the "automatic" option. If you're not so lucky, you'll have to follow the manual steps.
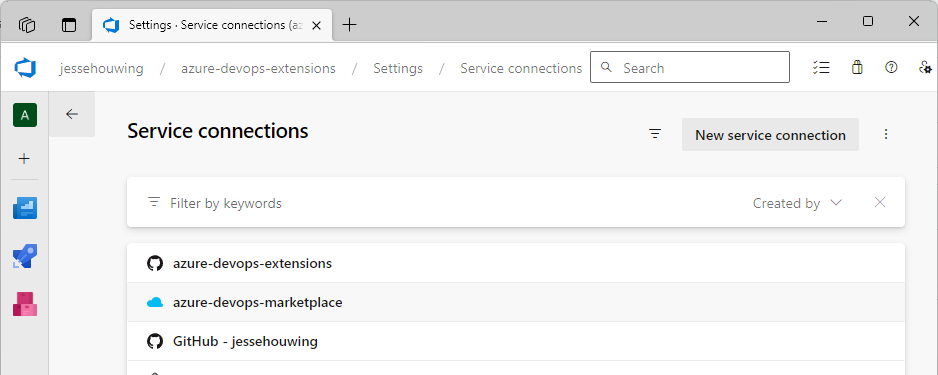
Go to the project in Azure DevOps that hosts your publishing pipeline, open ⚙️ Project Settings and then Service Connections:
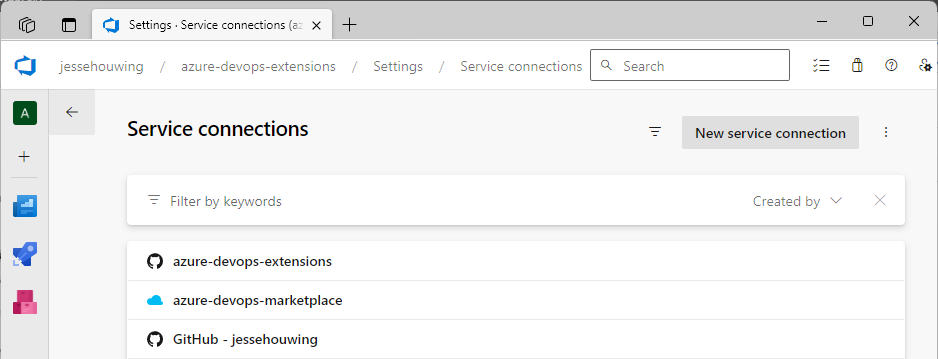
Then click New service connection.
From the list pick the Azure Resource Manager:
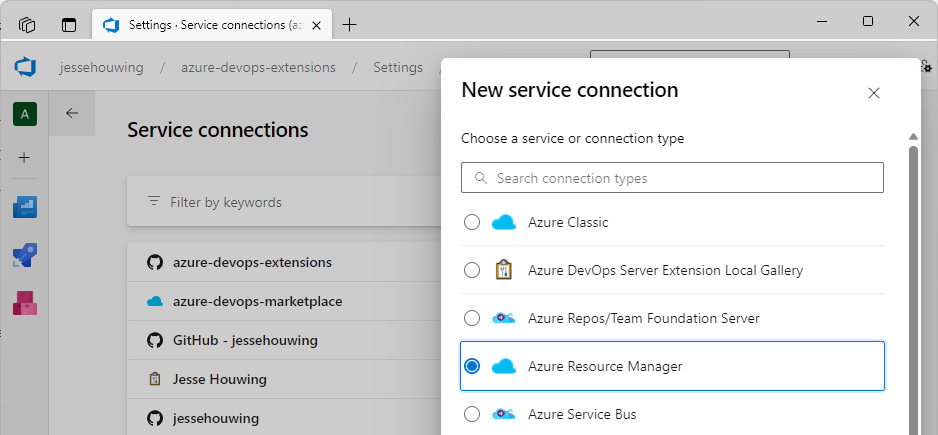
Then click Next.
Then select Workload Identity Federation (Automatic)
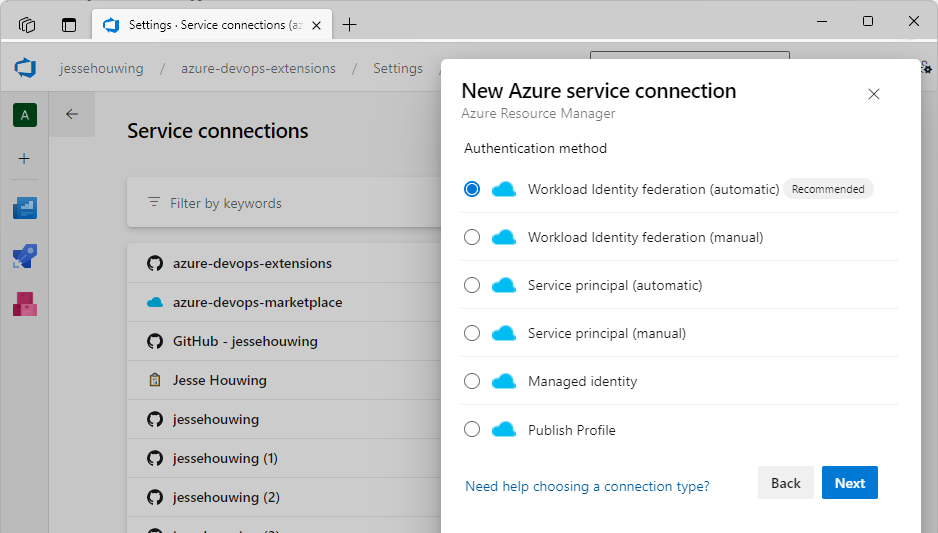
And click Next again.
Select your Azure Subscription and a Resource Group and give your service connection a name:
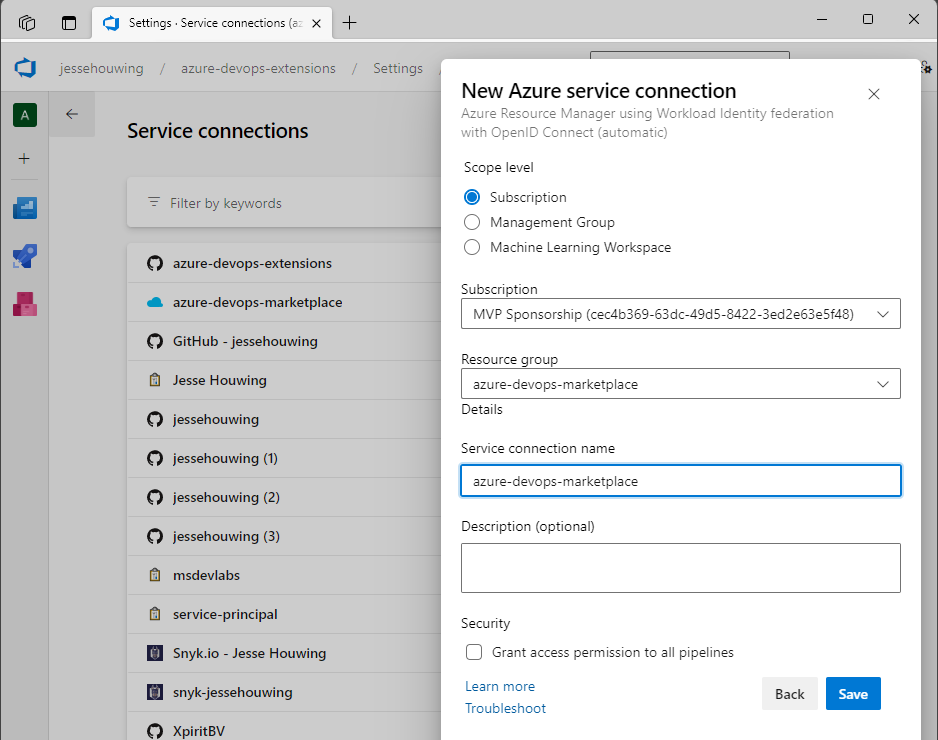
Then click Save.
Azure DevOps will now set up and negotiate a few things in the selected Azure Subscription.
Add the Service Principal to your Azure DevOps organization as a user
You now need to add the Service Principal as a user to your Azure DevOps organization. To do so, you'll need to full display name of the created service principal.
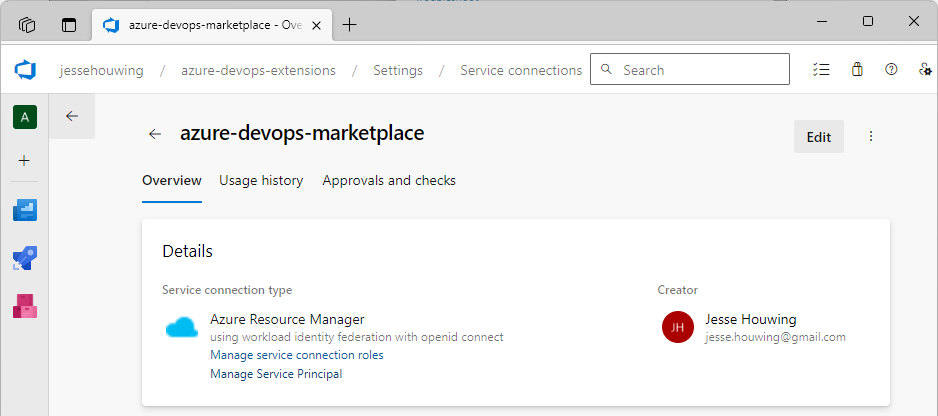
Open the Service Connection you've just created:
In the details screen click on Manage Service Principal.
This should bring you to the Azure Portal and should open up the overview panel for the selected Service Principal:
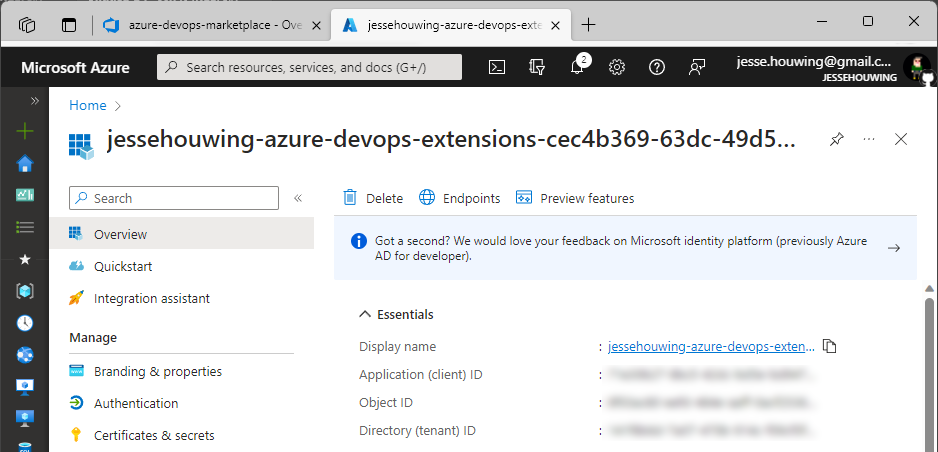
Click the little📄icon behind the Display Name to copy the full display name to your clipboard.
Now go back to Azure DevOps and open the ⚙️ Organization Settings and then Users:
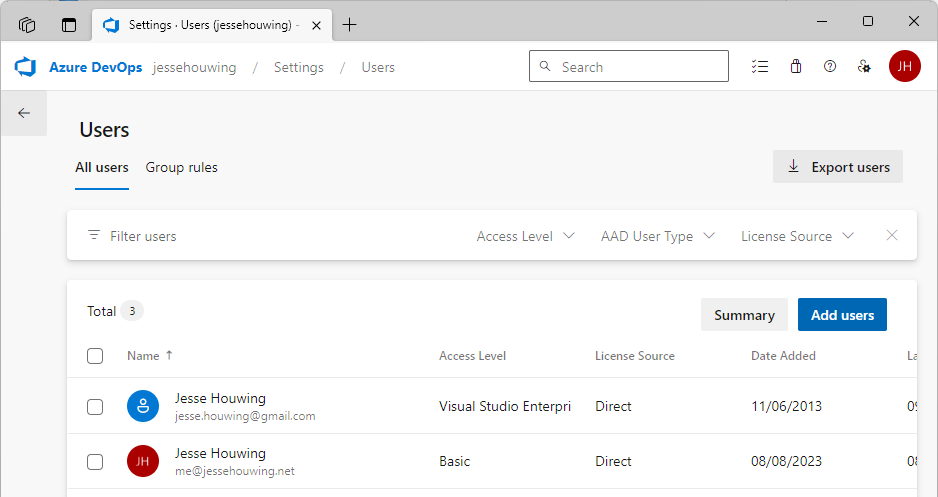
Click Add users.
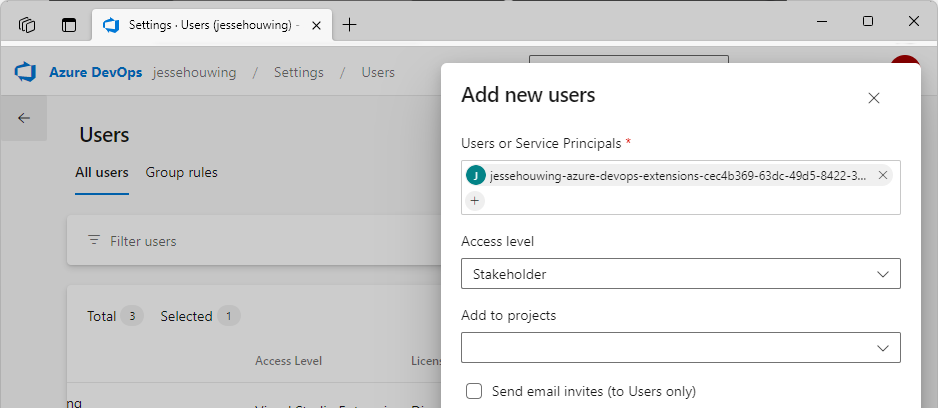
Now paste the service principal's display name into the Users or Service Principals, select the Access Level (Service principals will consume a license):
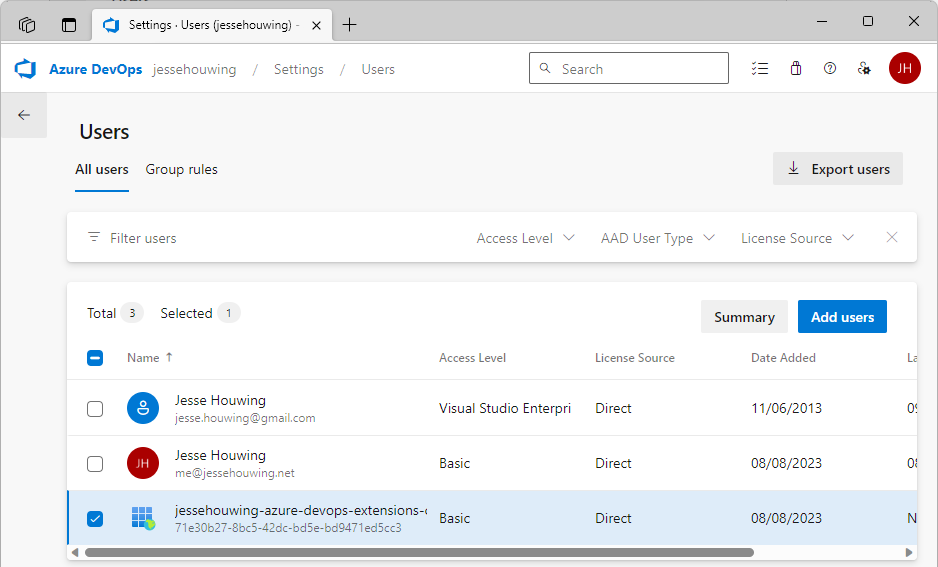
The service principal should now be listed as a user:
Extract the Azure DevOps Identity Id from the Profile API
To grant the Service Principal access to the publisher on the Azure DevOps marketplace, we'll need its Team Foundation Identity ID. And to get that, we'll need to query the Profile API. This is where the official docs get fuzzy because they simply state:
Add a service principal as a member to a publisher account. You can get the service principal's ID from its profile using Profiles - Get.
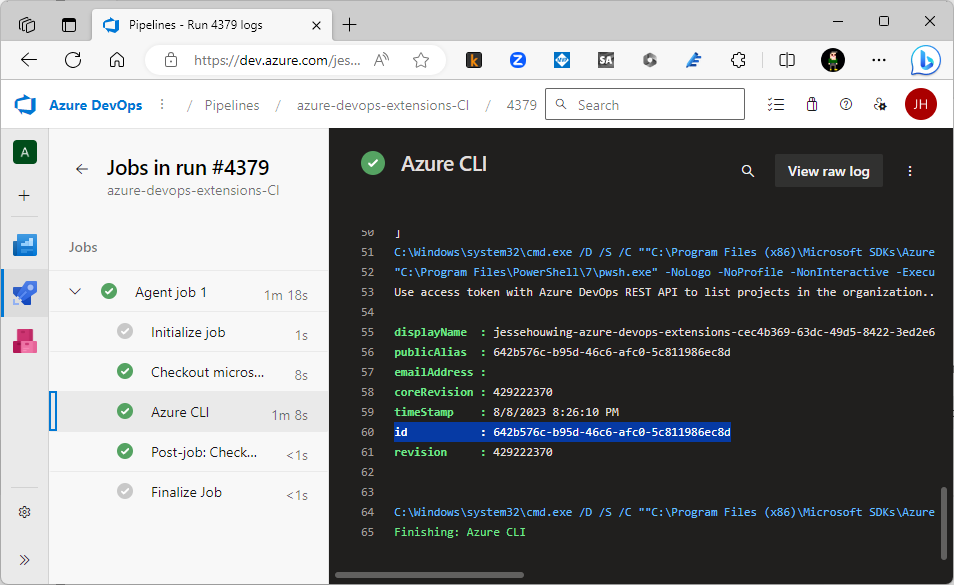
To call the Profiles API you either need to be logged on as the profile's owner, or you already need to know its Identity GUID. In the end I created a small pipeline in Azure Pipelines and used the service principal to query its own Profile ID.
steps:
- task: AzureCLI@2
  displayName: 'Fetch profile for Service Principal'
  inputs:
    azureSubscription: 'azure-devops-marketplace'
    scriptType: pscore
    scriptLocation: inlineScript
    inlineScript: |
      az rest -u https://app.vssps.visualstudio.com/_apis/profile/profiles/me --resource 499b84ac-1321-427f-aa17-267ca6975798
Queue the build and grab the Identity from the logs:
Add the Service Principal to your Azure DevOps Marketplace publisher
Now that we have the proper Identity GUID for the Service Principal, we can add them as a user to the Azure DevOps marketplace:
Go to the Azure marketplace and sign in with the owner of your publisher. Click Publish Extensions, then Members:
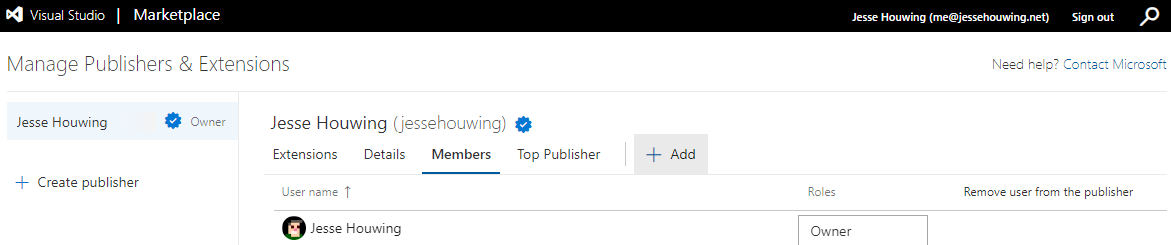
Now click ➕Add.
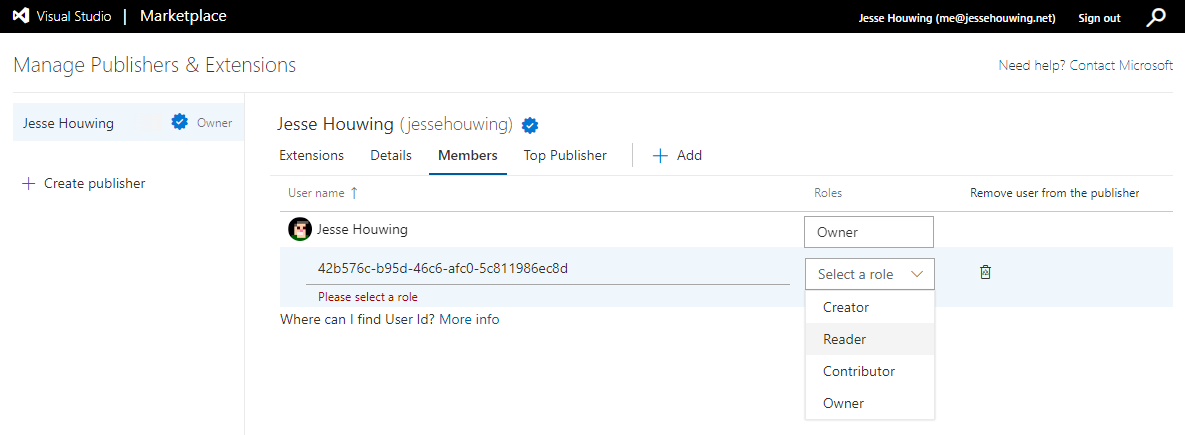
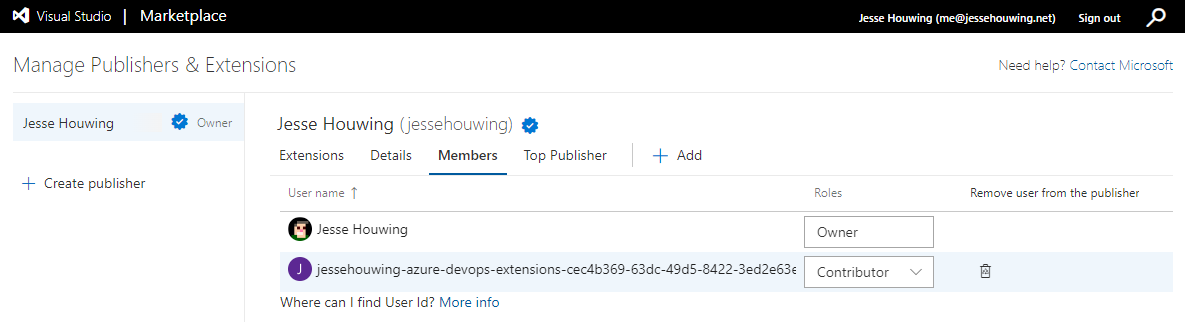
Paste the Identity ID from the previous step and Select a role. Personally, I first set the role to Reader to see whether the correct Display Name would show up before setting the role to Contributor:
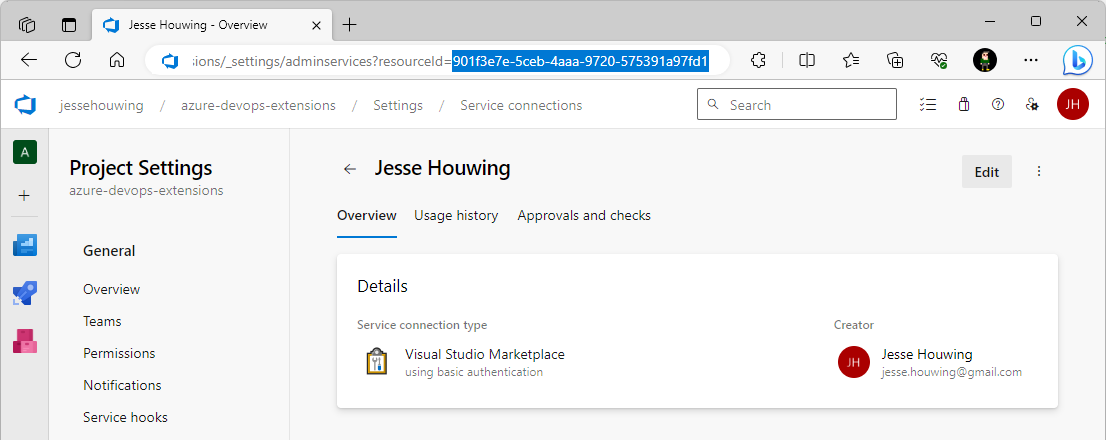
Find the Id of your Visual Studio Marketplace service connection
Now we'll need the Id of the Visual Studio marketplace service connection.
Go back to your Azure DevOps organization, open the Project that contains your publishing pipeline, select ⚙️ Project Settings and then navigate to Service Connections.
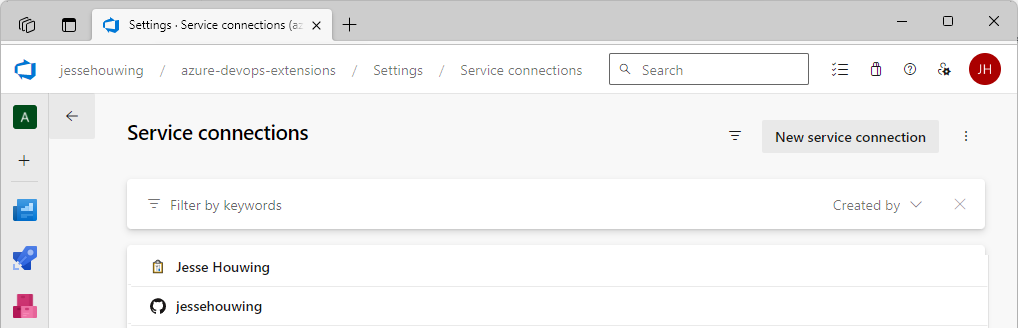
Open the service connection you are using to publish to the Visual Studio Marketplace and copy the resourceId from the URL:
Add an AzureCLI step to your pipeline(s) to request a valid token for the job
And now, for the final step, add a step to the pipeline that uses the service connection to receive a job token and then overwrite the token on the service connection with it. We'll use the AzureCLI@2 task to fetch the token and then log a special command string to overwrite the personal access token that's stored on the Visual Studio Marketplace Service Connection:
# Add a variable that holds the ID of the service connection and use that throughout your pipeline

variables:
- name: 'marketplaceServiceConnection'
  value: '24325a98-0d4b-4180-9936-c930a4156258'

stages:
- stage: 'Publish'
  displayName: 'Publish'
  jobs:
  - job:
    displayName: 'Publish'
    steps:
    - task: AzureCLI@2
      inputs:
        azureSubscription: 'azure-devops-marketplace'
        scriptType: 'pscore'
        scriptLocation: 'inlineScript'
        inlineScript: |
          $accessToken = az account get-access-token --resource 499b84ac-1321-427f-aa17-267ca6975798 --query "accessToken" --output tsv
          write-host "##vso[task.setsecret]$accessToken"
          write-host "##vso[task.setendpoint id=$env:MARKETPLACESERVICECONNECTION;field=authParameter;key=password]$accessToken"

...

    - task: PublishAzureDevOpsExtension@4
      name: 'publishDev'
      inputs:
        connectTo: 'VsTeam'
        connectedServiceName: '$(marketplaceServiceConnection)'
To ensure the job token isn't logged to the screen, we'll also issue another task.setSecret command. The agent will recognize this and will scrub the token from the logs from that point forward.
And you're done!
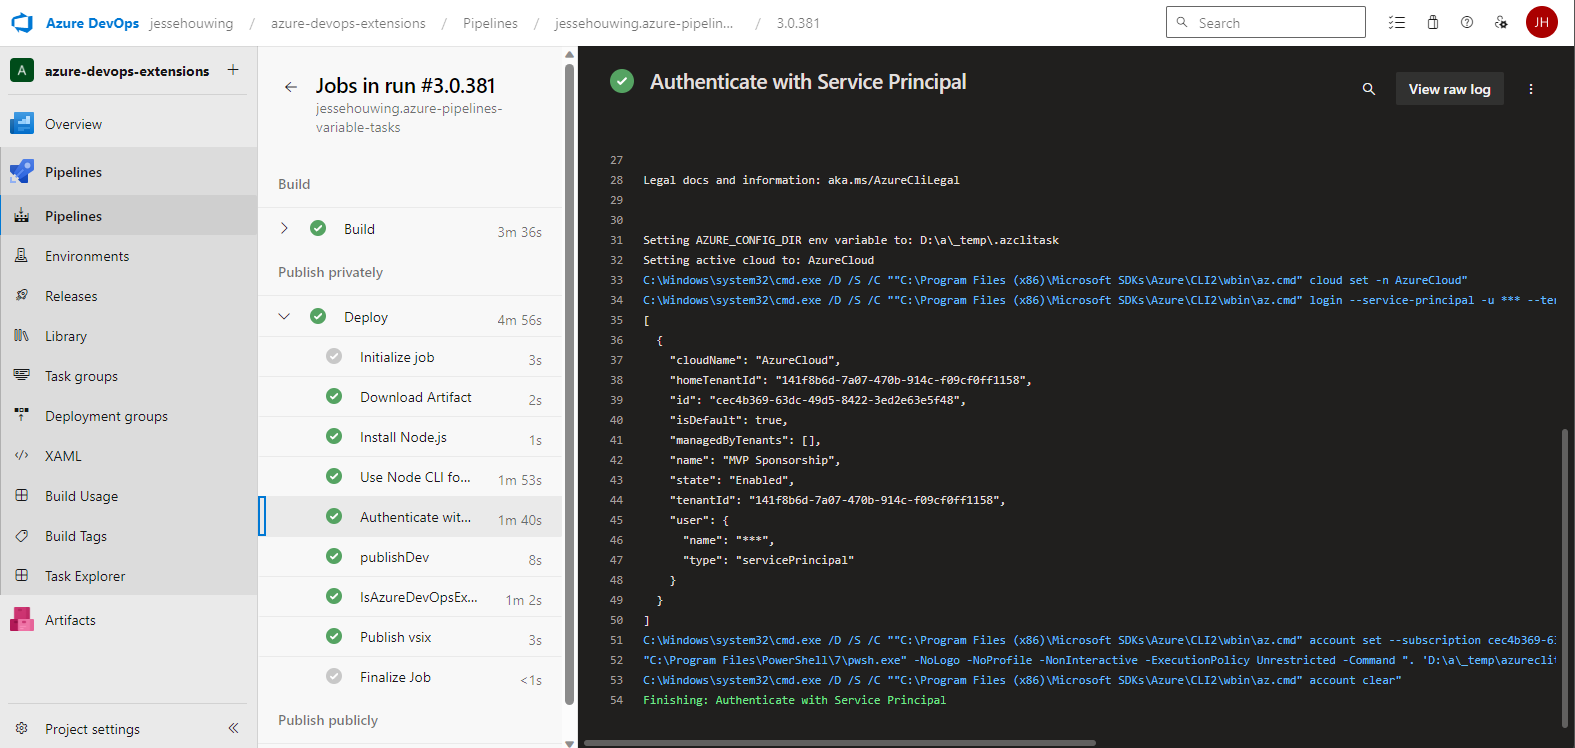
That's it! You're done! You won't see anything different when running your next pipeline other than the step that fetches your Service Principal credentials:
Other issues I had to resolve
Your Azure DevOps Organization must be linked to the same Azure Active Directory Tennant
My Azure DevOps Organization originally wasn't linked to Azure Active Directory and for the tutorial above that won't work. So, I've linked my Azure DevOps Organization to my Azure Active Directory tenant prior to changing the configuration.
An Active Directory Guest can't add a service principal by name to Azure DevOps
Originally, I had a lot of issues trying to add the service principal to Azure DevOps as a user. It turns out you must be signed into an Active Directory Member account. My primary user is a guest in my own active directory and that caused issues.
I invited my other account to Azure DevOps and added it to the Project Collection Administrators group. Signed in with that user and was able to add the service principal.
You need the correct permissions in Azure Active Directory to setup a Service Principal
In this blog I've assumed you have ample permissions in your Active Directory. I of course have the luxury of having the credentials of my own Global Administrator account.
It's also possible to have another person set up the service principal and then use the manual workflow for setting up the Workflow Identity Federation service connection manually.